XChat isn't the easiest program to configure, so here's a step by step guide for first-timers. (Click on any screenshot to see the full size version.)
Step 1: Define a new network
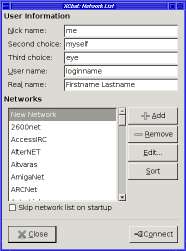
 XChat groups all servers by network, so you need to define a network for Linuxchix. Use the dialog under XChat->Network list... (if you've never used XChat before, it may show you the Network List to begin with).
Click Add and replace New Network with a network name (e.g. LinuxChix). Then hit return -- that part is very important, otherwise xchat will revert the name to New Network.
While you're in the Network List dialog, this is a good time to choose your nick name (set first, second and third choices up at the top of the dialog). If in doubt, your first name or your usual login name are good choices.
Step 2: Add the server to the new network
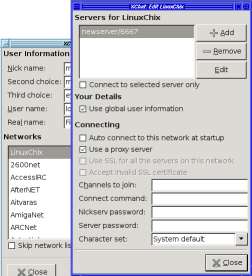
Click Edit to edit your new LinuxChix network. This will pop up a second dialog, entitled XChat: Edit LinuxChix. It will start with a line that looks like:
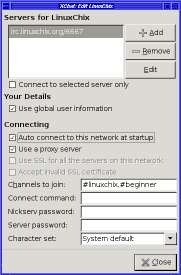
newserver/6667. Change this to irc.linuxchix.org/6667 and hit return. Litterally, hit return/enter. Clicking out of it won't work.
Step 3: Add the channels
In the lower half of the Edit dialog, add the channel names you want to connect to: e.g. #linuxchix or #beginner; if you're adding more than one channel, put commas between them, and don't forget the # for each channel name!
You shouldn't have to worry about the other options in this dialog, but there's one worth noting: if you check Auto connect to this network at startup, then every time you start up xchat it will automatically connect to Linuxchix. Otherwise, you'll have to go to Step 4 each time.
Click Close -- you're done with this dialog.
Step 4: Connect!
Back in the Network List dialog, with your LinuxChix network selected, click Connect. This should log you in to our IRC channel.
Good luck!


